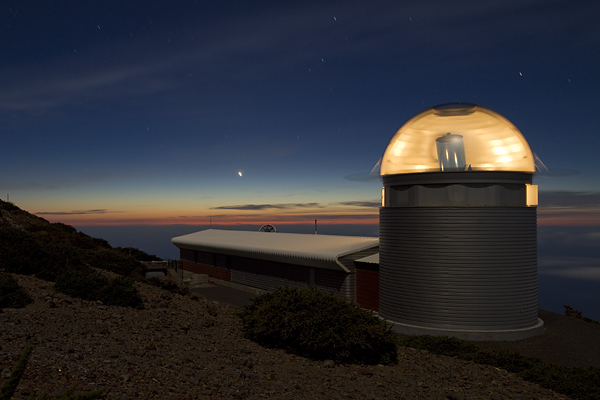
Public outreach is important for Astronomy on every level. Tell someone the word astronomy, and people will think of the colorful images from the Hubble Space Telescope, or pictures of the magnificent view of the Milky Way above distant shiny – white or silver – domes on deserted mountaintops (above the cloud level of course), or images of huge mirrors in metallic frames inside a building, which probably has a truly sci-fi look with lights all around, strange windows, and enormous scales. (Or they think of an old man with a strange hat and long white beard, sitting at a desk covered with hand-drawn maps of the sky in front of a small, copper telescope… But that is a different story.) So we need the fancy images, because they may not represent the scientific content of our research, nor they tell interesting details about the high level of engineering behind the magnificent constructions we work with, but they do represent the beauty of our Universe, and they make people curious about the secrets outside of this World. I am sure this picture would raise numerous questions in the mind of an outsider:

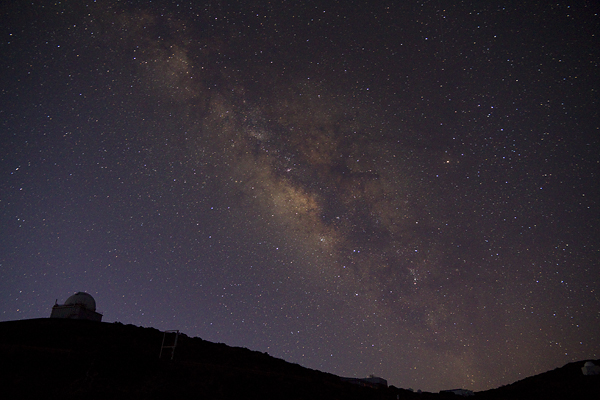
This is the 1.2 meter Mercator Telescope on La Palma (the bright setting “star” is Venus). And there is a whole story about how I took the picture. I had to make several calculations, to have the perfect result. First of all, the basic idea is to have a long exposure, turn on the light inside, then rotate the dome 180° to “sample” the interior through the rotating slit. The dome has a rotation speed of 3°/second, this means that you need 60 seconds for the whole half circle, but you should take a bit more, because it is better to start at a point, where the slit is not yet visible, and end when it is not visible any more. So rotating 200° is perfectly enough. This gives a safe exposure time of 75 seconds (you need those extra seconds for safety reasons – I will tell you why). Now, you do not want to overexpose anything in your image, so you have to take care of two things. The sky should not be too bright (which places you somewhere around the time of the nautical twilight – which is perfect, because you can take the picture between the calibrations and the real observations, literally in the twilight zone), and the inside of the dome has to be also well exposed. Basically the latter will set your ISO or f value (as the exposure time is already set by the rotation speed of the dome). Because from the width of the slit you can easily find out, that light will be visible from the same inside point for 12 seconds (it takes this amount of time for the slit to rotate its own width), so you have to set your ISO or f to a value, using which a 12 second exposure of the non-moving dome is not yet overexposed (simulating the passage of the slit on the moving dome). Then you will have to take the picture, when these given settings are not overexposing the sky anymore (as we are heading to the night and the light level gets lower). So when you reach this point during the twilight, there comes the difficult part. Because you are alone, the camera is outside, the dome-control is inside and you have to push two buttons at the same time. So, what can you do? You need to use a timer, set your camera to start the exposure in 1 minute, check the time on your watch, start the timer, run in, and when the 60 seconds are elapsed, start to rotate the dome. When you are done with the needed 200°, the exposure will just automatically (thanks to your calculations) finish outside :) And you have the safety extra seconds, so a couple of seconds plus or minus wont ruin your final picture. Three important things: 1) you need to do this when the Moon is up in the sky if you want to see more than the inside and the bright horizon, because the illumination of the building and the scenery around is the effect of the moonlight. 2) Set the telescope into a position close to vertical, so if – by any chance – something happens to fall down during rotation from the side of the slit, it will not fall into the tube. (Upright position is safe, because there is no moving part above the tube at this setting, even if the tracking of the dome – meaning that the position of the slit follows the pointing of the telescope – is switched off, and you rotate the dome around without co-moving the telescope with it.) 3) No precious observing time is lost, because at the time of the nautical twilight, the sky is still too bright to start measurements. To close this detailed manual, I show you the rising Milky Way on the morning of yesterday. No calculations were carried out for this image :)

Grat!! Nagyon szép!
Szupi.
Egészen földönkívüli az 1. kép.
Hey Peter,
I want to compliment you on this picture.
Cheers,
Thanks Valery, your comment means a lot for me ;)